Custom Field Types and Labels
BusyContacts supports many predefined field types and an unlimited number of field labels.
Field Types
BusyContacts supports many predefined field types, such as phone, email, URL, and address. Each contact can contain an unlimited number of each field type (multiple phones, multiple emails, multiple addresses, etc.).
In addition, each field type can have an unlimited number of labels. For example, the phone field type can have labels for home phone, work phone, mobile phone, and satellite phone.
You can choose which field types to show on all cards in Info Panel Settings or you can add fields to a single card using the add field menu.
Field Labels
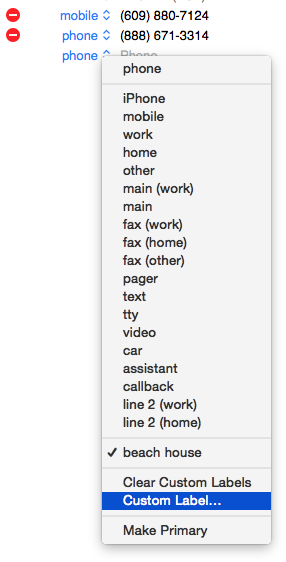
Each field type has a predefined list of labels. For example, the phone field type has built-in labels for home, work, mobile, main, etc.
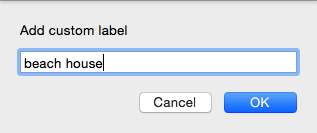
You can add custom labels by clicking on a field label and choosing Custom Label.


Once a custom label is created, it will appear on the label menu permanently and can be used when creating or editing other contacts. If you want to make the custom label the default choice, you can do so in Info Panel Settings.
If you wish to delete the custom labels from the menu, select Clear Custom Labels. Note: clearing a custom label will remove it from the label menu, but will not remove it from any fields that are using that label.
Custom Fields
Note: Custom Field Types and Labels are only supported on CardDAV servers, such as iCloud and Google. They are not supported on Exchange/Office 365.
Since we like to turn things up to 11, BusyContacts adds an additional predefined field type called Custom. The purpose of the Custom type is to let you extend the data model if you have a piece of data doesn't fit neatly into one of the standard predefined types.
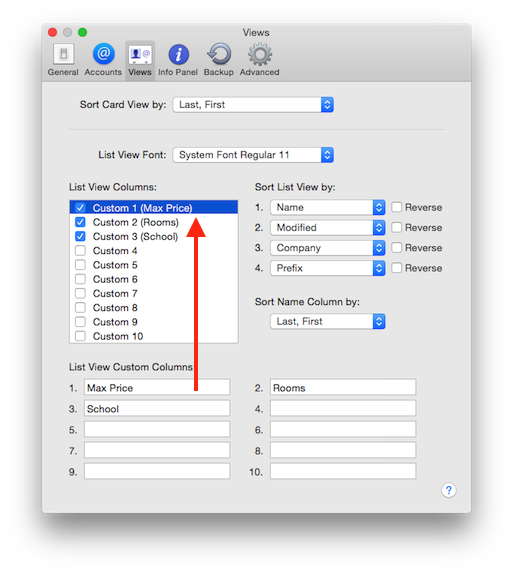
For example, a realtor may want to use the custom fields to record information for each client's requirements like maximum price, number of rooms, and school district.
To illustrate this example, the process would involve adding the Custom field to the Info Panel in Info Panel Settings or with the Add Field menu. Then creating field labels for Max Price, School, and District.

In addition to showing Custom fields in the Info Panel, you can display up to 10 custom fields in the List View by entering the Custom field labels in Info Panel Settings and checking them.

You can do interesting things with Custom Fields in the List View and Smart Filters. The List View is smart about sorting Custom Columns. It will automatically sort strings, numbers, and money correctly. You can even perform arithmetic comparisons on the data. For example, you could make a Smart Filter that finds all contacts that have a Max Price ≤ $500,000 and Rooms ≥ 3.