Smart Filters
Smart filters are a powerful tool for creating calendar sets and saved searches that can be applied with a single click.
NOTE: Some images in our online documentation may appear outdated as BusyCal continues to evolve over time. However, the core functionality mentioned in the documentation still applies.
Smart filters are a powerful tool for creating calendar sets and saved searches that can be applied with a single click. You can create smart filters to:
- Display a set of calendars.
- Show events that match certain conditions, such as a text string or event type.
- Apply view settings, such as the columns displayed and sort order in List view.
To create a smart filter, choose Filter > New Smart Filter (or press ⌘-Control-N) and fill in the dialog that appears. Some examples follow.
Calendar Sets
With Calendar Sets, you can quickly switch between different groups of calendars with a single click. For instance, you might have one set that includes all your work-related calendars, another for personal appointments, and a third for family activities. By selecting a particular Calendar Set, BusyCal will display only the calendars included in that set, helping you focus on the relevant events and tasks without the distraction of unrelated calendar entries.
A calendar set can be created by enabling the "Remember visible calendars" option when setting up a new smart filter. This option then remembers and associates your currently "checked" calendars in the side panel with the new smart filter. By setting up various smart filters, you can conveniently switch between different sets of calendars with just one click.
You can disable this option if you prefer to use the smart filter as a "saved search" that should always apply to the currently selected set of calendars.
To create a new calendar set:
- Select the calendars you want to show or hide by checking them in the left sidebar.
- Choose Filter > New Smart Filter or press ⌘-Control-N.
- Select “Remember visible calendars,” give the filter a name, like “Work,” and click OK.
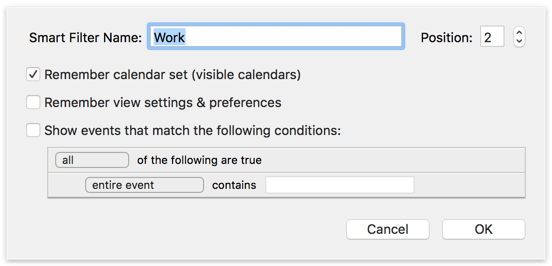
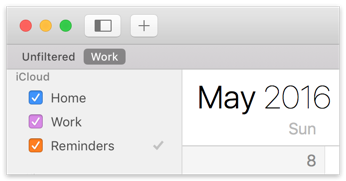
The new filter is added to the Filter bar, and clicking it displays the calendar set.
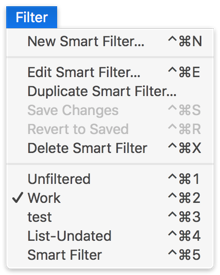
The filter can also be applied by selecting its name from the Filter menu or by pressing its keyboard shortcut. The first smart filter listed is “Unfiltered” with a keyboard shortcut of ⌘-Control-1. You can think of Unfiltered as the standard or default filter. The next smart filter (Work, in this example) corresponds to ⌘-Control-2.
Saving Changes
If you show or hide additional calendars by checking them in the left sidebar, the Filter button in the toolbar displays a * (asterisk) next to its name, indicating that the current filter has changed.
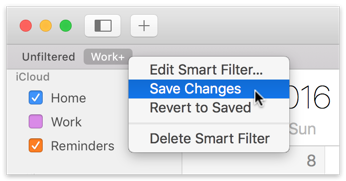
When your calendar selection has changed, such as after you uncheck a calendar momentarily:
- To save the changes, choose Filter > Save Changes, press ⌘-Control-S, or Control-click the button in the toolbar and choose Save Changes from the contextual menu.
- To discard the changes, press ⌘-Control-2 (the Work filter’s keyboard shortcut), ⌘-Control-R (for Revert), or Control-click the button in the toolbar and choose Revert to Saved from the contextual menu.
BusyCal does not automatically save changes to the calendar set. This is an incredibly powerful feature as it allows you to temporarily uncheck / check a calendar only momentarily.
Content Matching
You can create powerful smart filters to show events that match various conditions, such to dos that contain a certain string of text and that were modified in the last 30 days.
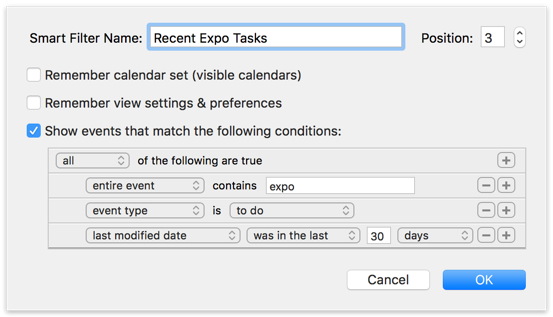
To create a content-matching smart filter:
- Choose Filter > New Smart Filter or press ⌘-Control-N.
- Select “Show events that match the following conditions,” configure the settings shown above, name the filter, and click OK.
- A button with the smart filter’s name appears on the Filter Bar, and clicking it applies the filter. Note that the filter button appears in blue, which indicates that it is showing only events that match certain conditions.
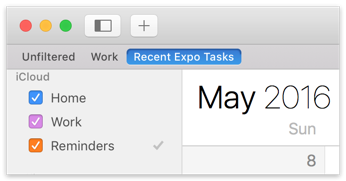
You can create some pretty sophisticated smart filters for things like:
- Due Date is in the next x days.
- Priority is High.
- Tag contains “Client X”
- Modified in the last x days.
- Location contains “Starbucks”
- Event type is Meeting.
- Meeting Status is Maybe.
Nested Filters
You can create nested sub-conditions by holding down Option and clicking the ellipsis (…) button, and then choosing All, Any or None for the sub-conditions.
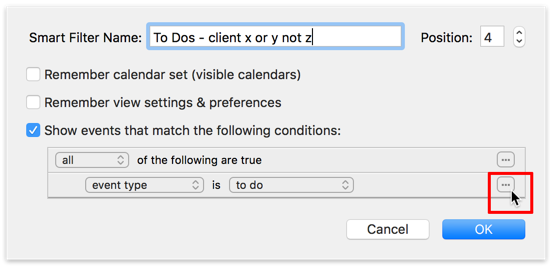
For example, you could create a smart filter that matches ALL event types that are to dos, ANY tags that contain client x or client y, and NONE that have a tag containing client z.
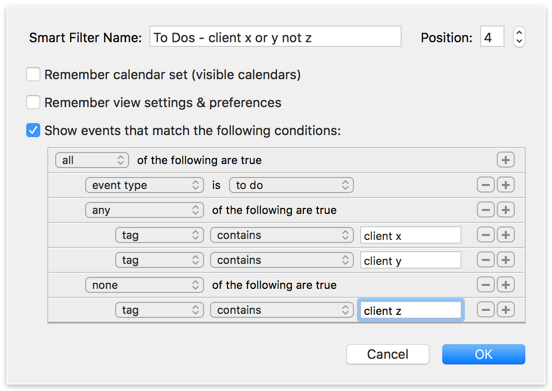
View Settings
You can customize the calendar views in BusyCal, like a 4-day Week, a 3-week Month, or a List view with a custom number of days and columns shown.
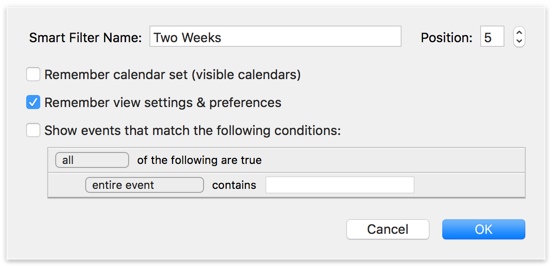
You can use smart filters for recalling these custom views with a single click, as follows:
- Customize the current view (e.g., change the number of days or weeks shown in the Week or Month view, or the columns displayed in List view).
- Choose Filter > New Smart Filter or press ⌘-Control-N, select “Remember view settings & preferences,” name the filter, and click OK.
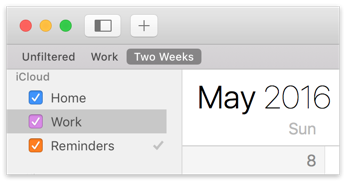
- A button with the smart filter’s name appears on the Filter Bar, and clicking it displays the custom view.
Combination Filters
A smart filter can include any combination of calendar set, view settings, and conditions. For example, a smart filter could combine a set of calendars with a 6-week month view. For a more sophisticated example that uses tags as a condition, see Time Tracking.
Calendar Set Syncing
As of BusyCal v2024.4.2, Smart Filter now automatically sync across all your macOS devices. For iOS users, Calendar Sets sync exclusively between other iOS devices.
To disable Calendar Set syncing, go to Settings > Advanced > Other > Sync Smart Filters & Calendar Sets and toggle the feature off.