Using BusyCal with Fruux
Fruux is a popular third-party CalDAV server. As such, you can connect to it with BusyCal for calendar syncing and sharing. BusyCal can connect to Fruux, using it to sync calendars across your devices and share them with others.
UPDATE: As of July 2020, Fruux servers have introduced a bug where it would either return malformed responses to requests or would fail to process requests of a certain size. This bug has not been fixed (last checked Jan 2022) and affects everyone. Fruux customer care has not responded to complaints. Unfortunately we would not recommend using Fruux. Instead please explore many of the other popular services out there: iCloud / Google / Fastmail and so on.
For details on using BusyCal with Fruux, see the following:
Syncing with Fruux
BusyCal can use Fruux to sync calendar data across your devices.
To sync BusyCal with Fruux, do the following:
- Choose BusyCal > Preferences > Accounts.
- Click the + (plus) button to add a new account.
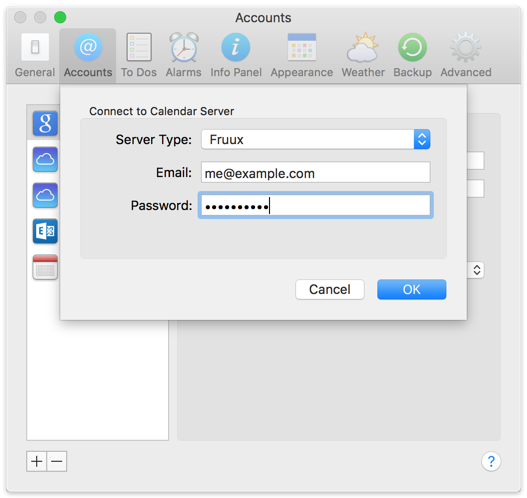
- Choose Fruux from the Server Type pop-up menu, enter your Fruux email address and password, and click OK.
Sharing Calendars wth Others through Fruux
BusyCal enables you to share calendars with other Fruux users. Once each user has configured BusyCal to sync with their personal Fruux account, you can then share calendars with each other through Fruux. When a calendar is shared through Fruux, events can be edited by any user and changes sync between them.
Share a Calendar with Other Fruux Users
To share a calendar with other Fruux users:
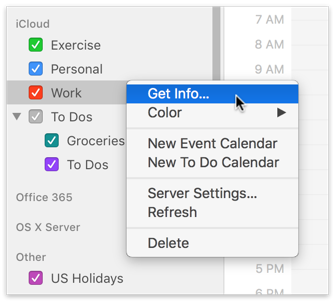
Control-click the calendar in the left sidebar and choose Get Info from the contextual menu.
Select the Share calendar checkbox.
Enter the Fruux email address of the person you want to share the calendar with. Select “Allow Write” if you want them to have read-write access, or deselect it to give them read-only access.
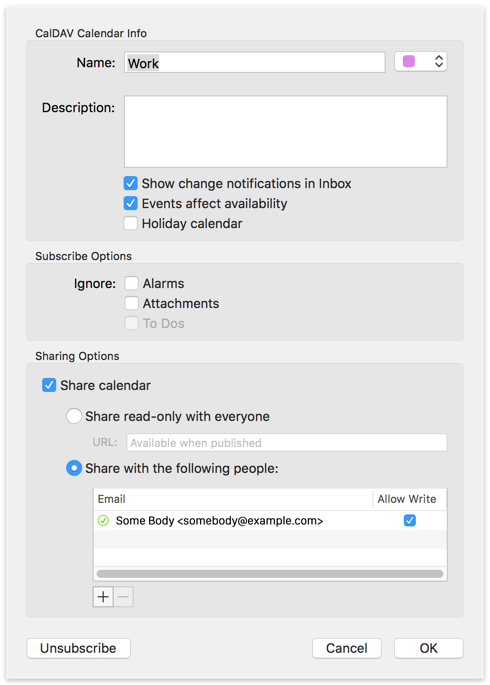
Click OK. BusyCal begins syncing with Fruux and an icon appears next to the calendar name indicating that it is shared.
The person(s) you shared with will receive a notification from Fruux inviting them to add the shared calendar. If they accept, the shared calendar appears in the left sidebar.
Shared Calendar Messages
When sharing calendars with others, there are two options you may want to enable, for keeping track of changes to events on shared calendars:
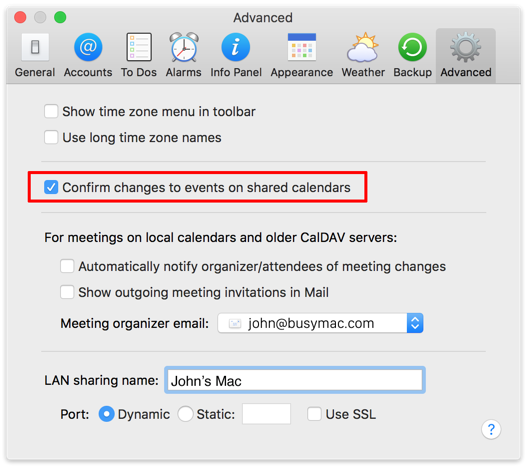
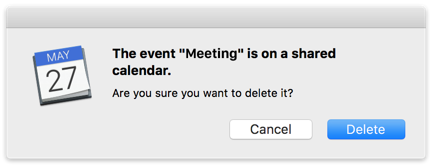
First, in BusyCal > Preferences > Advanced, select “Confirm changes to events on shared calendars” if you want to display a warning when you edit or delete an event on a shared calendar.
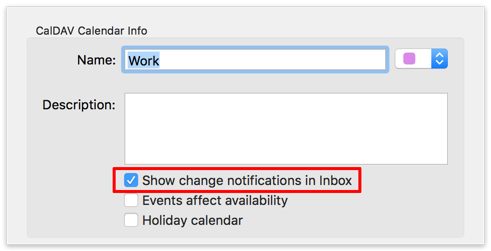
Second, in the Calendar Info dialog for any given calendar (which you can display by double-clicking the calendar name in the Calendar List), select “Show change notifications in Inbox” to display a badge on the app icon and a message in the Inbox when events are added or changed by others, or deselect it to avoid seeing badges and Inbox notifications for that calendar.

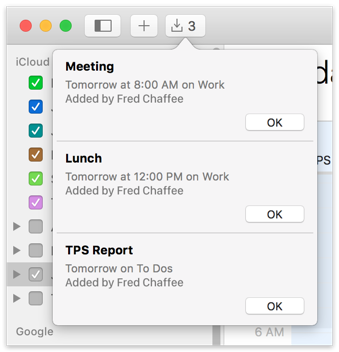
Click OK to dismiss each message in the Inbox. Or, hold down Option and OK changes to OK All, enabling you to dismiss all messages with a single click.
Hosting Calendars on Fruux
Fruux is a CalDAV server that hosts your calendars and syncs them with client apps. BusyCal and the built-in Calendar app on OS X and iOS are all client apps that sync with Fruux.
This means any data you enter into one client app will sync to all other client apps through Fruux. As long as you have all client apps configured to sync with the same Fruux account, all your calendar and contact data remain in sync.
Calendars Must Be Hosted on Fruux
All calendars you want to sync between your Macs, iOS devices, and other users, must be hosted on Fruux. You cannot sync calendars from other sources (On My Mac, iCloud, Google, Exchange, etc.) to Fruux.
If you have any existing calendars hosted elsewhere that you want to host on Fruux, you can move them to Fruux or merge them with an existing calendar on Fruux.
Merge with a Calendar on Fruux
For this example, let’s say you have a local calendar called “Work” that you want to merge with an existing calendar on Fruux called “Fred.” Here’s how to do it:
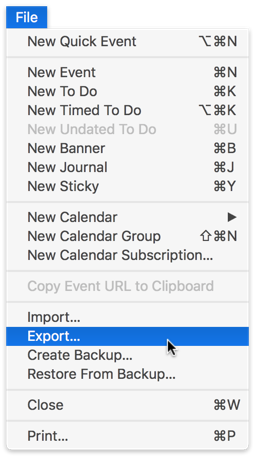
Export the Work calendar by selecting it in the left sidebar and choosing File > Export, and save it to your desktop. Then delete the Work calendar from BusyCal by Control-clicking on it and choosing Delete.
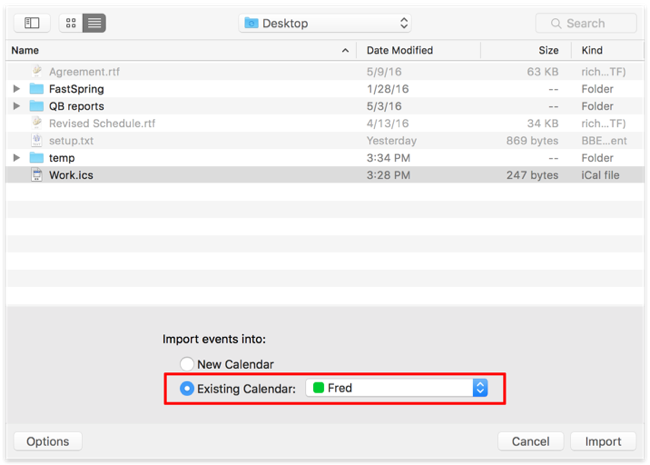
Choose File > Import, and select the file you exported in step 1. On the bottom of the import dialog, select the option to Import events into Existing Calendar, and choose the Fred calendar (which is hosted on Fruux). This will add the events from the Work calendar to the Fred calendar on Fruux.
Tip: After merging the calendars, you can remove duplicate events by choosing Help > Find Duplicates.
Move a Calendar to Fruux
For this example, let’s say you have a local calendar hosted on your Mac called Home that you want to host on Fruux. Here’s how you can move it to Fruux:
- Select the local Home calendar in the left sidebar, choose File > Export, and save it to your desktop. After successfully exporting the Home calendar, delete it from BusyCal by Control-clicking it in the left sidebar and choosing Delete from the contextual menu.
- Choose File > New Calendar > Fruux to create a new calendar hosted on Fruux and name it “Home.”
- Choose File > Import and select the file you exported in step 1 to import it. If the “Import events into” section does not appear at the bottom of the dialog, click Options to display it. Select Existing Calendar and choose the Home calendar (which is now hosted on Fruux). BusyCal adds the events from the old Home calendar to the new Home calendar on Fruux.